
Content
Table of Contents
Introduction
postman is a development tool for testing API interfaces. You can directly enter the postman official website to create API requests yourself, choose different methods and different ways of passing parameters. The interface is friendly and convenient for testing and debugging. Postman can not only debug online through the editing interface, but also export the edited interface file and running environment in json format, run through the local command line, or write the command line in Gitlab’s CI configuration file to complete automated batch testing before the project goes online.
Postman official website address: https://www.postman.com/
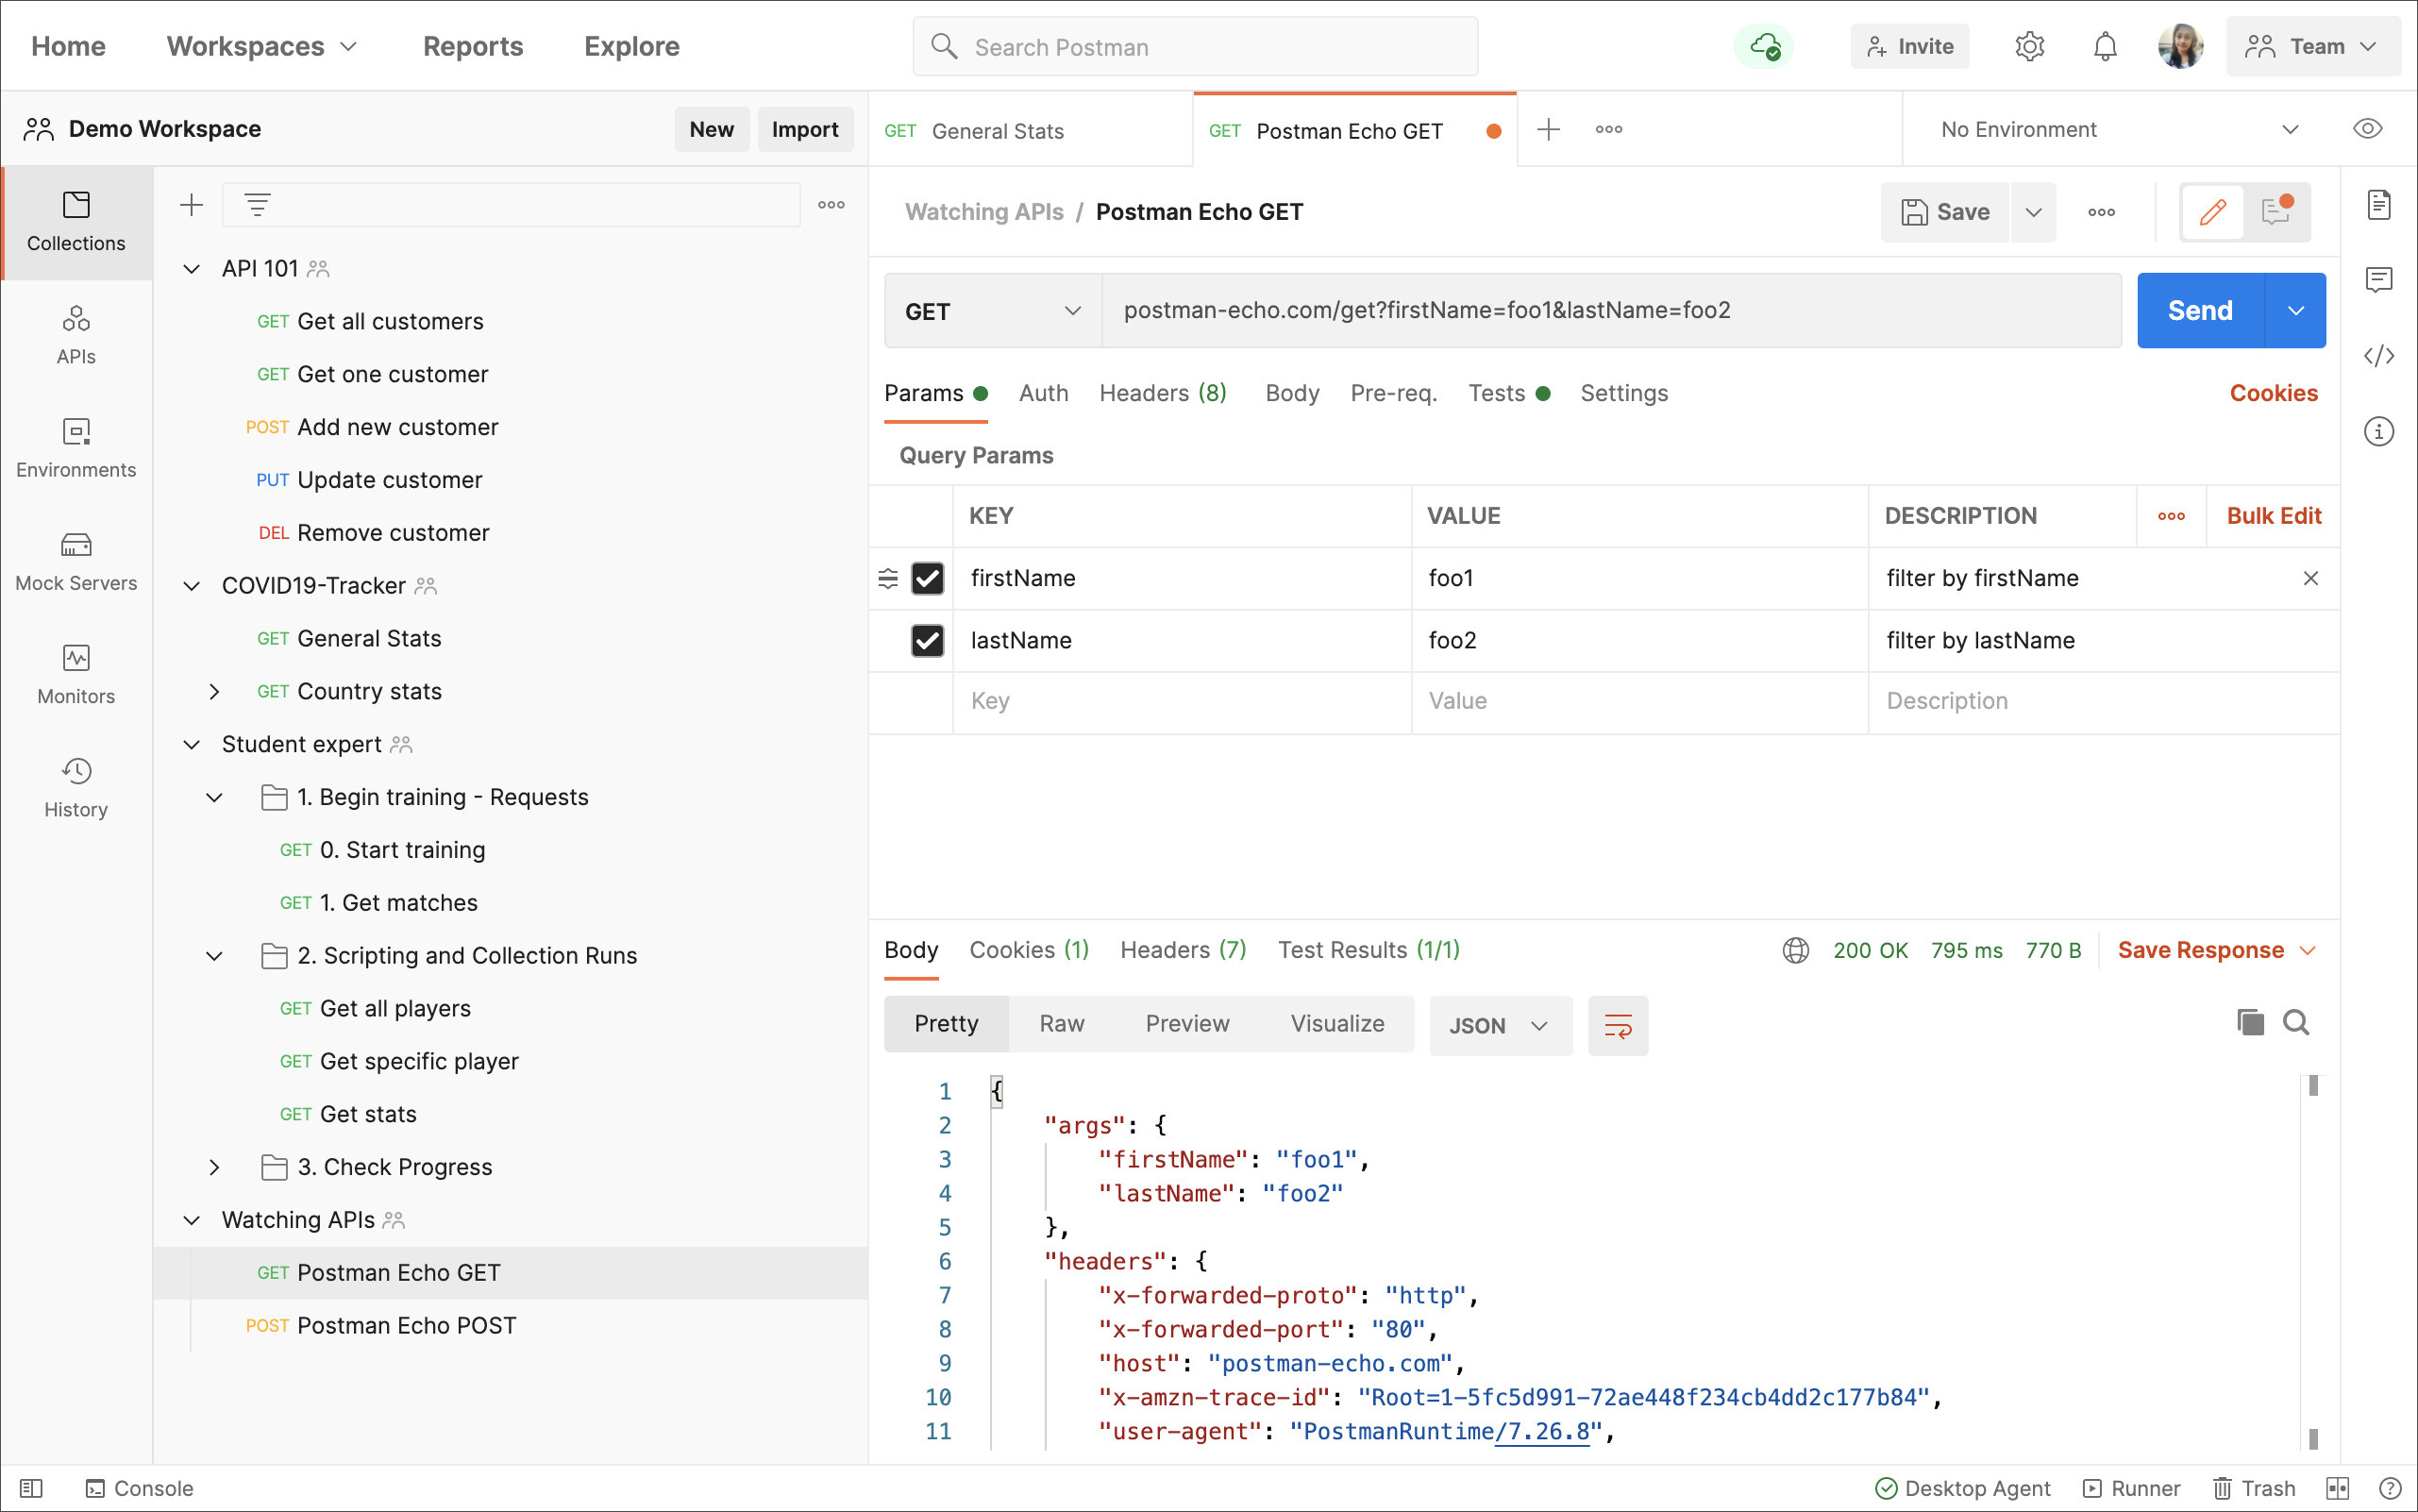
The postman webpage is as follows. You can create a request test directly on the webpage:
Postman also has a client, which can be tested and debugged locally. It is generally recommended to download the client here, which has more functions to use. The author uses the mac osx client in this article.
Client installation method:
- mac
You can download the app directly from the official website and install it;
- windows
You can download the exe file directly from the official website and install it;
- linux
For specific download methods, see official documentation
postman client batch test
Use the client for batch testing,
In collections, select the subfolder you need to test, and click the Run icon in the upper right corner to perform batch testing.
One thing to note is that the test order is performed from top to bottom of the API by default. Although you can manually adjust the order in the batch test preparation interface, the order will not be saved in the next test. Therefore, it is recommended that you arrange the order when creating the API, which will also facilitate the export of the test file for more operations in the next step.
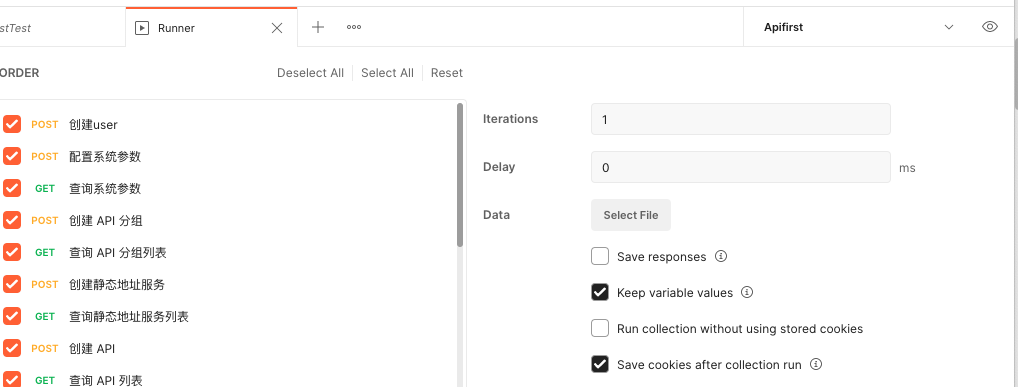
In the test preparation interface, you can set the number of tests and the maximum acceptable delay (you can directly follow the default value) and then click Run xx below to run the batch test. All test results will appear in the console below.
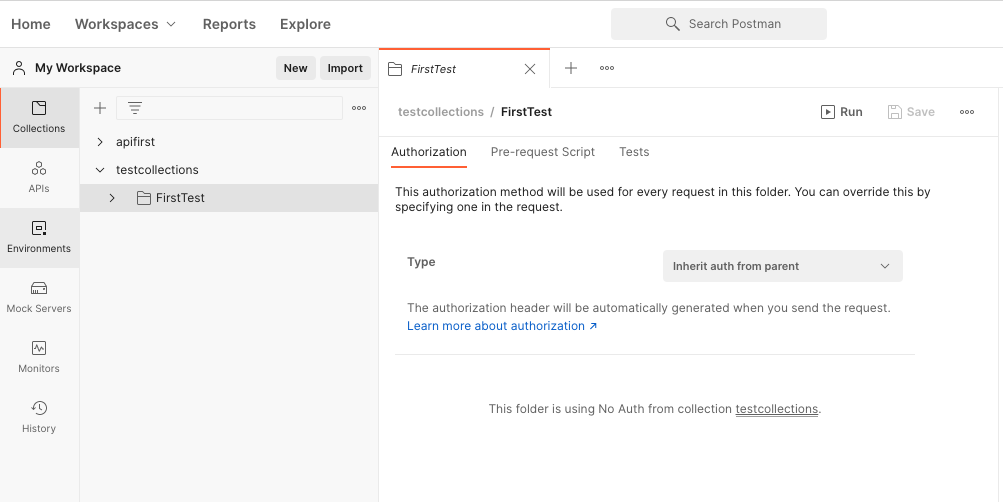
Environments settings
Batch testing involves variable transfer and assignment, so some variables must be set. In the left navigation bar, there is Environments to create variables. If you select Global when creating, it means that global variables are created, or you can create an environment yourself, which can store a set of variables:
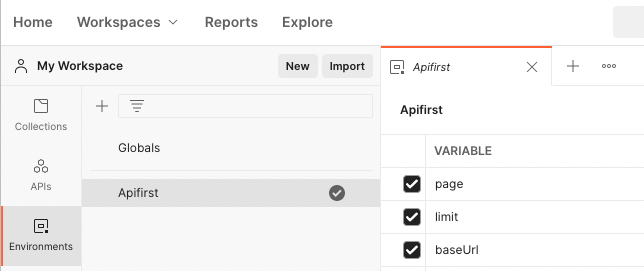
When running batch tests, you can select the corresponding environment. Click the three small dots in the upper right corner to export the settings of the environment variables in the json format.
Write scripts
For batch testing, parameter transfer and assignment are often required, and scripts need to be written to dynamically assign environment variables. At the same time, some Test scripts need to be written to perform simple tests.
For the two scripts tests and pre-request, it can be understood that the tests script is run after the request is executed, while the pre-request script is run before the request is executed. Another point to note is that since the environment variables can be automatically obtained, there is no need to write the value code in the pre-request script.
Write Tests script
The first thing you need to write is the tests script. If you don’t write the Tests script during batch running, you will find that no test is performed in the results. The simplest test script is to verify whether the return code in the return body is 200:
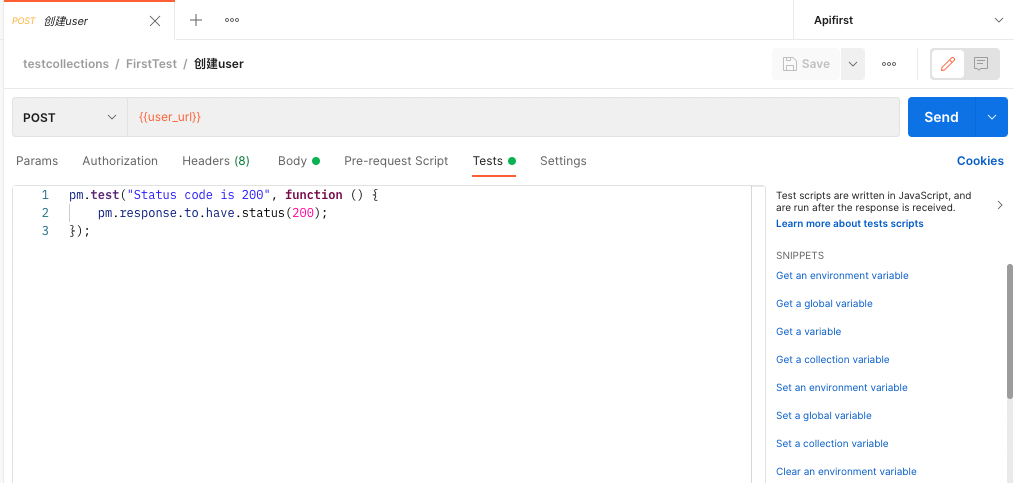
As shown above, if 200 is returned when running the test, passed will be displayed in the result interface. On the right side of the interface are some common script syntaxes, and you can choose some suitable ones for testing.
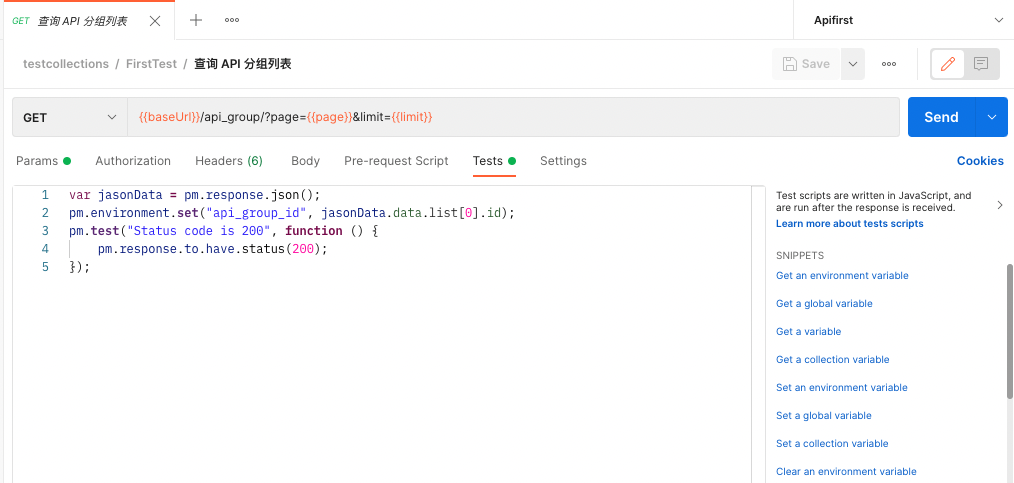
The following figure shows an example of assigning values to environment variable parameters.
Write Pre-request script
The pre-request script is run before the request is sent, and the passed parameters are executed in the test script, so there is basically no need to write too much in this script. If there are special requirements, the basic script syntax is consistent with test.
Newman command line batch test
To perform command line testing locally, three aspects are generally required:
-
Download and install the
newmantool; -
Exported test files;
-
Exported environment variable files;
Download and install Newman
First, you need to download nodejs, download address: https://nodejs.org/en/download/current/
Then install newman
# nodejs contains the npm command, if not, you can install it separately
npm install -g newman
Run batch tests using the command line
First, export two test files on the postman client and name them:
Test file: test collections.json
Environment file: Apifirst.json
Then run the command
newman run testcollections.json -e Apifirst.json
Meaning: Run newman batch test using the Apifirst.json environment
You can get the following results:
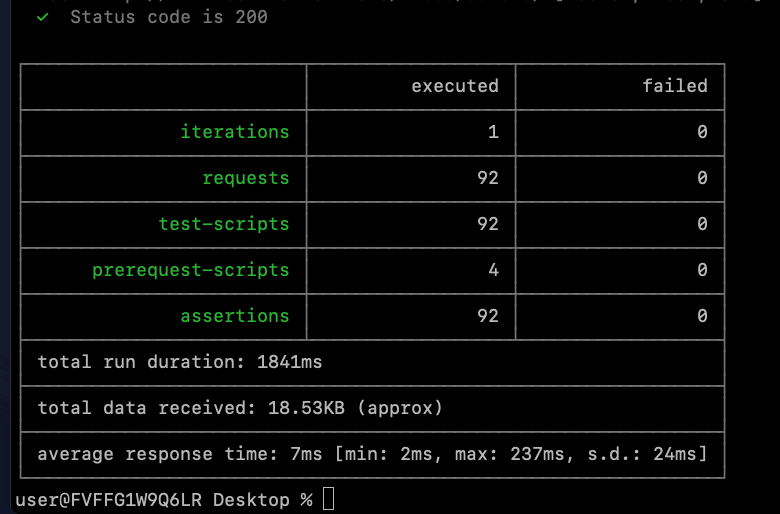
The results show some specific information about the test.
Newman+Gitlab deployment automated test
You can write the script program of the previous step (Newman command line batch test) in the deployment test script in the deployment file.
Run-test.js
/*
Reference document
https://github.com/postmanlabs/newman
https://github.com/DannyDainton/newman-reporter-htmlextra#newman-reporter-htmlextra

npm install -g newman-reporter-htmlextra

*/

const newman = require('newman');
const fs = require('fs');

newman.run({
collection: './testcollections.json',
environment: './apifirst.json',
reporters: ['cli', 'htmlextra'],// Select the type of report to generate
iterationCount: 1,
reporter: {
htmlextra: {
export: '../index.html', //Specify the path to generate the report
}
}// The following function part can handle related errors in the automated test process
}, function(err, summary){
if (err || summary.error || summary.run.failures.length) {
fs.writeFile('./flag.log', 'failed', function (error) {
if (error) {
console.log('Write failed')
} else {
console.log('Write successfully')
}
})
console.error('collection run encountered errors or test failures')
// process.exit(1)
} else {
fs.writeFile('./flag.log', 'succeeded', function (error) {
if (error) {
console.log('Write failed')
} else {
console.log('Write successfully')
}
})
}
});
integration_test.go
//Run nodejs script
cmdstr := "cd ./tests; node run-test.js"
cmd := exec.Command("/bin/bash", "-c", cmdstr)
err = cmd.Run()